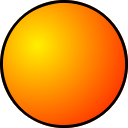
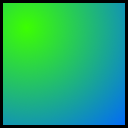
To make the pseudo 3-D effect of the trophy and ship spinning around each other on the final screen of Space Racer I just used a simple scaling trick. By gradually changing the scale in SpriteBatch it appears as if the sprites are zooming in and out along the Z-axis.
To do this, let's first make a new Windows Game project in C#. Call it SpinningSprites. Click OK, build and run the empty game to be presented with the familiar cornflower blue screen.
Now that we know everything was created as planned we need to add content to our project.
To do this, let's first make a new Windows Game project in C#. Call it SpinningSprites. Click OK, build and run the empty game to be presented with the familiar cornflower blue screen.
Now that we know everything was created as planned we need to add content to our project.
 |
 |
Go ahead and copy these images to your hard drive by right clicking and saving. Or if you'd like, you can use your own images. Add them to the game by dragging the images to the SpinningSpritesContent project in Visual Studio or right click on the SpinningSpritesContent project and choose Add->Existing Item. Find and select the images and click Add.
Now that we've added the content it's time to add some code. Towards the top of the class, add two Texture2D variables just after the GraphicsDeviceManager and SpriteBatch declarations.
Now that we've added the content it's time to add some code. Towards the top of the class, add two Texture2D variables just after the GraphicsDeviceManager and SpriteBatch declarations.
Texture2D imageOne;
Texture2D imageTwo;
Texture2D imageTwo;
Now load the textures by adding these statements to the LoadContent() method.
imageOne = Content.Load<Texture2D>("One");
imageTwo = Content.Load<Texture2D>("Two");
imageTwo = Content.Load<Texture2D>("Two");
If you've changed the name of the image files, or if you are using your own images, change the strings accordingly. Now we move to the Draw() method where the magic happens. We essentially want two things to happen to achieve this effect. One image needs to move from left to right and then back to the left repeatedly while the other image moves in the opposite direction. At the same time one image needs to shrink while the other grows. When the shrinking image has reached it's minimum size it begins to grow while the other shrinks. Let's go ahead and write the code to make one image continually move left and right. Add this after the call to GraphicsDevice.Clear(Color) in the Draw() method.
Viewport viewport = GraphicsDevice.Viewport;
float displacement = (float)Math.Sin(gameTime.TotalGameTime.TotalSeconds * 3) * 75;
Vector2 position1 = new Vector2(viewport.Width / 2.0f + displacement, viewport.Height / 2.0f);
float displacement = (float)Math.Sin(gameTime.TotalGameTime.TotalSeconds * 3) * 75;
Vector2 position1 = new Vector2(viewport.Width / 2.0f + displacement, viewport.Height / 2.0f);
We get the viewport and use it's center as the pivot point at which the images will oscillate about. We can use a sine wave to move the image back and forth. We get time from gameTime, use 3 for the frequency to speed it up and 75 for the amplitude to change how far from the pivot point (or phase) the image will travel. When we add our displacement to the phase (screen center) we get the current position at which the image should be on this update. To get the second image moving in the opposite direction, subtract the displacement from the second image's position.
Vector2 position2 = new Vector2(viewport.Width / 2.0f - displacement, viewport.Height / 2.0f);
If we were to draw this now we would see two images moving left and and right in opposite directions. We need to scale the images to achieve the pseudo 3-D effect. We want the largest and smallest sizes of the images to occur when they are at the center. We can do this using XNA's built in linear interpolation function found in the MathHelper library. Add this next.
float scale1 = MathHelper.Lerp(0.75f, 1.25f,
(float)Math.Cos(gameTime.TotalGameTime.TotalSeconds * 3) / 2.0f + 0.5f);
float scale2 = MathHelper.Lerp(0.75f, 1.25f,
-(float)Math.Cos(gameTime.TotalGameTime.TotalSeconds * 3) / 2.0f + 0.5f);
(float)Math.Cos(gameTime.TotalGameTime.TotalSeconds * 3) / 2.0f + 0.5f);
float scale2 = MathHelper.Lerp(0.75f, 1.25f,
-(float)Math.Cos(gameTime.TotalGameTime.TotalSeconds * 3) / 2.0f + 0.5f);
Since a scale of 1.0f is the actual size of the images, will use 0.75f as our smallest size and 1.25f as our largest size. To interpolate between the two points we'll use a Cosine wave. We need to use the same frequency we used for the displacement or the rotation won't be timed correctly. When we divide by 2 and add 0.5 the wave will oscillate between 0 and 1. We use Cos here since we used Sin for displacement. As such, interpolating using Sin will return 0.5 when the image is at the center, while Cos gives us our desired result of 0 or 1. Now it's finally time to actually draw it! Add this next to the Draw() method.
spriteBatch.Begin(SpriteSortMode.FrontToBack, BlendState.AlphaBlend);
spriteBatch.Draw(imageOne, position1, null, Color.White, 0,
new Vector2(imageOne.Width / 2.0f, imageOne.Height / 2.0f),
scale1, SpriteEffects.None, MathHelper.Clamp(scale1, 0, 1));
spriteBatch.Draw(imageTwo, position2, null, Color.White, 0,
new Vector2(imageTwo.Width / 2.0f, imageTwo.Height / 2.0f),
scale2, SpriteEffects.None, MathHelper.Clamp(scale2, 0, 1));
spriteBatch.End();
We start our SpriteBatch using FrontToBack Sort Mode. This will correctlly draw the image with the larger scale in front of the smaller image when we pass the scale to the layerDepth in spriteBatch.Draw(). We clamp the layerDepth to make sure it doesn't get larger than 1 since we won't be able to see it if that happens. Everything else is pretty standard except we're setting the origins to the image centers so they draw at the center of the screen.
Build and run the game. You'll see a pretty neat effect where it appears the images are rotating around each other. By messing with some numbers and/or adding some code you can acheive all kinds of different movements and effects. With the right textures perhaps you can use it for a magic spell in an RPG or an icon to show what item is selected in a menu screen. If you have any questions let me know and I'll try to answer as best I can.
Build and run the game. You'll see a pretty neat effect where it appears the images are rotating around each other. By messing with some numbers and/or adding some code you can acheive all kinds of different movements and effects. With the right textures perhaps you can use it for a magic spell in an RPG or an icon to show what item is selected in a menu screen. If you have any questions let me know and I'll try to answer as best I can.


